Growing Your Own Salad Greens on a Small Patio: A Quick Start Guide
Can you imagine having a constant supply of fresh greens right in your own backyard, no matter how small it is?
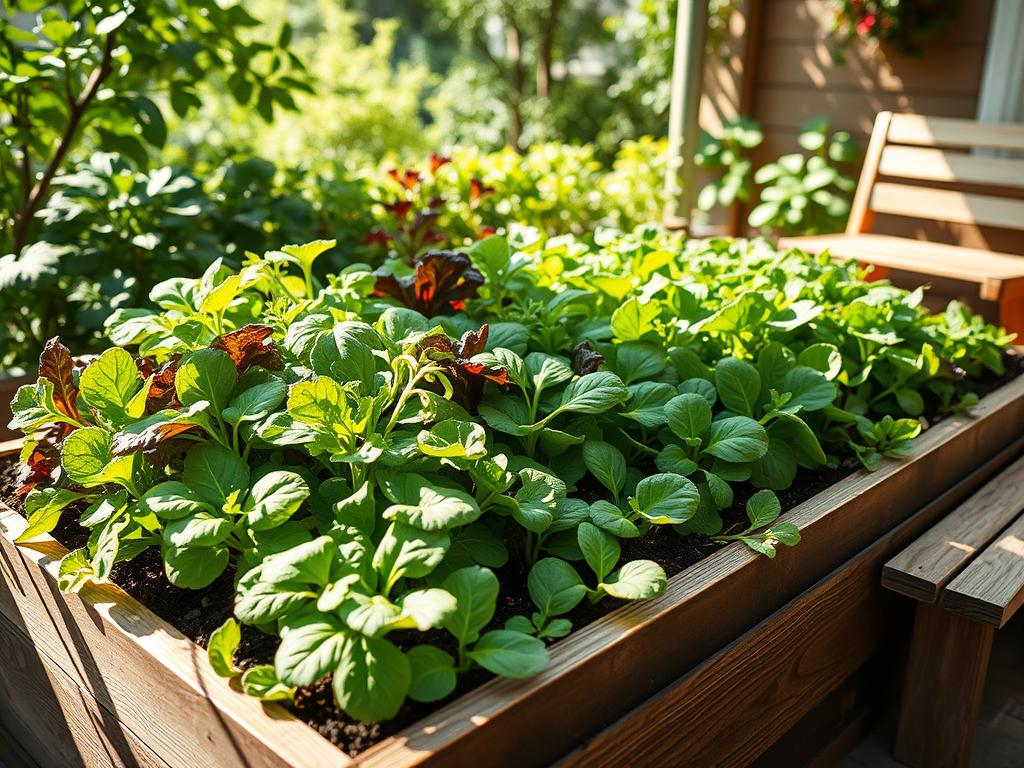
Growing your own healthy salads is not only a rewarding hobby but also a great way to ensure you’re eating the freshest ingredients possible. Even with limited space, you can cultivate a variety of Salad Greens on your patio.
This guide is designed to walk you through the easy steps of starting your own salad garden, even if you’re a beginner. By the end of this guide, you’ll be on your way to enjoying fresh, home-grown salads in no time.
Benefits of Growing Salad Greens at Home
Cultivating your own salad greens is a simple way to enhance your diet with fresh, nutritious ingredients. By growing organic lettuce and other mixed greens at home, you can enjoy a continuous supply of fresh produce right on your patio.
Nutritional Value of Fresh Greens
Freshly harvested nutritious leafy greens are packed with vitamins, minerals, and antioxidants that are often lost in store-bought greens due to transportation and storage time. Homegrown greens can be picked at the peak of freshness, ensuring maximum nutritional value.
The nutritional benefits of leafy greens include high levels of vitamin K, vitamin A, and folate. These nutrients are crucial for maintaining healthy bones, vision, and cell function.
Cost Savings Over Store-Bought
Growing your own salad greens can lead to significant cost savings over buying them at the store. A packet of salad green seeds can cost as little as $2 and yield multiple harvests, making it a cost-effective way to enjoy fresh produce.
Moreover, by avoiding the markup associated with commercial produce, you can enjoy organic lettuce and other greens without the premium price tag.
Convenience of Harvesting
Having a salad garden at home provides the convenience of harvesting greens just when you need them. This not only ensures freshness but also encourages more frequent use of greens in your meals.
With a cut-and-come-again approach, you can harvest individual leaves as needed, allowing the plant to continue growing. This method provides a continuous supply of fresh mixed greens throughout the growing season.
Choosing the Right Salad Greens Varieties
The right selection of salad greens can transform your patio into a lush, edible garden, providing you with a constant supply of garden-fresh greens for your salads.
When it comes to growing salad greens, the variety you choose can significantly impact the flavor, texture, and nutritional value of your salads. A diverse salad mix not only adds visual appeal but also ensures a broad spectrum of nutrients.
Leafy Greens: Lettuce, Spinach, and Kale
Leafy greens are the backbone of most salads, offering a range of flavors from mild to bold. Lettuce varieties, such as Romaine and Buttercrunch, are popular for their crunchy texture and mild taste. Spinach adds a nutritional boost with its high iron content, while kale brings a robust flavor and a wealth of vitamins.
These greens are relatively easy to grow and can thrive in the cooler temperatures of spring or fall. For a continuous harvest, consider planting a mix of these leafy greens.
Quick-Growing Options: Arugula and Radishes
For those looking for a quick turnaround, arugula and radishes are excellent choices. Arugula adds a peppery flavor to salads and can be harvested in as little as 20 days. Radishes, while often used as a garnish, can also be grown for their greens, which can be used in salads or as a cooking green.
These quick-growing options are perfect for adding a burst of flavor to your salads and can be grown in succession to ensure a constant supply of garden-fresh greens.
Herbs to Enhance Your Salad
Incorporating herbs into your salad mix can elevate the flavor profile and add freshness. Herbs like basil, cilantro, and parsley are not only easy to grow but also complement the greens perfectly. Basil adds a sweet and slightly spicy flavor, while cilantro brings a fresh, citrusy taste. Parsley, with its mild flavor, can be used as a garnish or mixed into salads for added depth.
By combining these herbs with your salad greens, you can create a diverse and flavorful salad mix that will enhance any meal.
Container Selection for Salad Greens
The journey to fresh, home-grown salad greens starts with choosing the perfect container. When growing salad greens on a small patio, the right container can significantly impact the health and yield of your greens.
Best Pots and Planters for Small Spaces
For small spaces, it’s essential to choose containers that are not only compact but also provide enough depth for the roots of your salad greens to grow. Containers with a depth of at least 6-8 inches are recommended to allow for healthy root development.
Some popular options for small spaces include:
- Window boxes that can be attached to a balcony or patio railing
- Compact planters designed specifically for herbs and leafy greens
- Vertical garden planters that maximize space by growing upwards
Drainage and Soil Considerations
Proper drainage is crucial for preventing waterlogged soil, which can lead to root rot and other issues. Ensure your container has drainage holes to allow excess water to escape.
The type of soil used is also vital. A high-quality potting mix designed for containers is preferable over garden soil, as it is formulated to retain moisture but also drain excess water effectively.
Creative Container Ideas
Thinking outside the box can lead to some innovative container solutions. Consider repurposing items like:
| Container | Benefits | Considerations |
|---|---|---|
| Old Colanders | Built-in drainage, unique appearance | May rust, ensure secure hanging |
| Wooden Crates | Aesthetic appeal, can be repurposed | May rot, ensure proper drainage |
| Plastic Bottles | Eco-friendly, cost-effective | May require DIY modifications |
By choosing the right container and considering factors like drainage and soil quality, you can create an ideal environment for your salad greens to thrive.
Soil and Nutrients for Healthy Growth
To grow nutritious leafy greens, it’s essential to focus on the soil and nutrients that support their development. Salad greens require a well-balanced diet of nutrients to grow healthy and robust.

Quality Potting Mix
A high-quality potting mix is crucial for providing the necessary nutrients and support for salad greens. Look for a mix that is specifically designed for leafy greens and contains organic matter such as compost or well-rotted manure. This will help retain moisture, suppress weeds, and provide a slow release of nutrients.
Organic Fertilizers
Using organic fertilizers can enhance the growth and nutritional value of your salad greens. Options include fish emulsion, bone meal, and alfalfa meal. These natural fertilizers promote healthy microbial activity in the soil, which in turn supports the health of your plants.
pH Level and Nutrient Balance
Maintaining the right pH level and nutrient balance is vital for the optimal growth of salad greens. Most leafy greens prefer a slightly acidic to neutral soil pH (around 6.0-7.0). Regular soil testing can help you monitor and adjust the nutrient levels, ensuring your greens receive the necessary nutrients for healthy growth.
By focusing on these key aspects of soil management, you can create an ideal growing environment for your organic lettuce and other salad greens, leading to a bountiful harvest of nutritious and delicious greens.
Sunlight Requirements for Optimal Growth
Understanding the sunlight requirements for salad greens is crucial for a healthy and thriving crop. Salad greens generally require a significant amount of sunlight to grow well, but the specific needs can vary depending on the type of green.
Ideal Sun Exposure
Most salad greens need at least 4-6 hours of direct sunlight per day. However, some varieties like lettuce and spinach can tolerate partial shade, especially in warmer climates. Leafy greens such as kale and arugula tend to prefer full sun to partial shade.
- Lettuce and spinach: 2-4 hours of direct sunlight
- Kale and arugula: 4-6 hours of direct sunlight
- Other greens: 4-6 hours of direct sunlight
Tips for Growing in Shaded Areas
If your patio is shaded, you can still grow salad greens. Choose varieties that are bred for shade or partial shade. Some tips for growing in shaded areas include:
- Select shade-tolerant varieties like lettuce, spinach, or herbs like parsley and cilantro.
- Use reflective surfaces to maximize the available light.
- Keep the soil consistently moist, as shade can sometimes lead to reduced soil moisture.
Using Grow Lights in Limited Sunlight
If your patio receives very little natural sunlight, consider using grow lights. Grow lights can provide the necessary spectrum and intensity for salad greens to thrive. Here are some tips for using grow lights:
- Choose LED grow lights, which are energy-efficient and produce less heat.
- Position the grow lights 6-12 inches above the plants.
- Provide 12-14 hours of light per day to simulate a natural day.
By understanding and meeting the sunlight requirements for your salad greens, you can enjoy a bountiful harvest of healthy, delicious greens.
Watering Techniques for Salad Greens
To grow vibrant mixed greens, understanding the right watering techniques is essential. Proper watering ensures that your salad greens receive the right amount of moisture for healthy growth.
Understanding Water Needs for Different Greens
Different types of salad greens have varying water needs. For instance, lettuce and spinach require consistent moisture, while arugula can tolerate slightly drier conditions. Understanding these needs helps in maintaining the optimal watering schedule.
- Lettuce and spinach: Keep the soil consistently moist.
- Arugula: Can tolerate some dryness but performs best with regular watering.
- Kale: Prefers moist soil but can be more forgiving if watering is missed occasionally.
Best Practices for Container Watering
When watering salad greens in containers, it’s crucial to ensure that the soil is moist but not waterlogged. Here are some best practices:
- Water in the morning to allow plants to absorb moisture throughout the day.
- Check the soil moisture by inserting a finger into the soil up to the first knuckle.
- Avoid getting water on the leaves to prevent fungal diseases; water at the soil level instead.

Signs of Overwatering or Underwatering
Recognizing the signs of overwatering or underwatering is crucial for maintaining healthy salad greens. Overwatering can lead to root rot and yellowing leaves, while underwatering can cause leaves to become wilted and bitter.
- Signs of overwatering: Yellowing leaves, soft and mushy stems.
- Signs of underwatering: Wilting, dry edges on leaves, slow growth.
By adjusting your watering schedule based on these signs, you can ensure your garden-fresh greens remain healthy and thrive.
Pest Management for Your Salad Greens
To enjoy a bountiful harvest of green salad options, effective pest management is essential. Growing your own fresh greens can be a rewarding experience, but it comes with the challenge of protecting your plants from pests.
Common Pests That Target Leafy Greens
Several pests commonly target leafy greens, including aphids, slugs, snails, and caterpillars. These pests can cause significant damage to your plants, reducing the quality and quantity of your harvest.
- Aphids: Small, sap-sucking insects that can transmit plant viruses.
- Slugs and Snails: These pests chew holes in leaves, causing significant damage.
- Caterpillars: The larvae of butterflies and moths, caterpillars can eat through leaves and flowers.
Organic Pest Control Methods
Managing pests organically is crucial for maintaining the health and sustainability of your garden. Here are some effective methods:
| Pest | Control Method | Description |
|---|---|---|
| Aphids | Neem Oil | A natural insecticide that disrupts aphid reproduction. |
| Slugs and Snails | Copper Barriers | Copper repels slugs and snails, protecting your plants. |
| Caterpillars | Bacillus thuringiensis (Bt) | A bacterium that produces a toxin harmful to caterpillars. |
Prevention Tips for a Healthy Garden
Preventing pest infestations is as important as controlling them. Here are some tips to keep your garden healthy:
- Maintain Garden Hygiene: Remove weeds and debris that can harbor pests.
- Use Physical Barriers: Row covers can prevent pests from reaching your plants.
- Encourage Beneficial Insects: Attracting beneficial insects, like ladybugs and lacewings, can help control pest populations naturally.
By understanding the common pests that target your salad greens and using organic pest control methods, you can protect your garden and enjoy a healthy harvest of fresh greens.
Companion Planting with Salad Greens
By pairing salad greens with other plants, you can create a more resilient and diverse garden ecosystem. Companion planting is a traditional gardening practice that involves growing different plants together to improve their growth, health, and productivity.
The benefits of companion planting are numerous, and when applied to salad greens, it can enhance their flavor, texture, and nutritional value. Some plants, when grown together, can deter pests, attract beneficial insects, or even improve soil health.
Benefits of Pairing Greens with Other Plants
Pairing salad greens with other plants can have several benefits. For instance, certain plants can provide shade, reducing soil temperature and retaining moisture. Others can act as a trap crop, luring pests away from your salad greens.
- Pest control: Plants like marigolds and nasturtiums repel aphids and whiteflies, common pests that target salad greens.
- Improved growth: Basil and other herbs can enhance the flavor and growth of nearby greens.
- Soil health: Legumes, such as beans, can fix nitrogen in the soil, benefiting nearby plants.

Ideal Companion Plants for Healthy Growth
Some plants are particularly well-suited to be grown alongside salad greens. These include:
- Radishes: They can help break up compacted soil and deter cucumber beetles.
- Chives: Chives are known to repel aphids and other pests that target greens.
- Borage: This plant attracts beneficial insects and improves the overall health of nearby plants.
Avoiding Incompatible Plants
While many plants can be beneficial companions for salad greens, some should be avoided. For example:
- Fennel: Fennel can inhibit the growth of many plants, including salad greens.
- Members of the Brassica family: While some Brassicas like kale are salad greens, others can be too competitive or attract similar pests.
By carefully selecting companion plants, you can create a harmonious and thriving garden ecosystem that benefits your salad greens and enhances your overall gardening experience.
Harvesting Techniques for Salad Greens
To savor the best flavor and texture from your homegrown salad greens, mastering the harvesting technique is essential. Harvesting at the right time and using the correct method can significantly enhance the quality of your salad mix. This section will guide you through the best practices for harvesting your greens, maximizing your yield, and storing them to keep them fresh for healthy salads.
Timing and Method for Harvesting Greens
The ideal time to harvest salad greens depends on the variety. Generally, leafy greens are ready to be harvested when they are between 2 to 4 inches tall. For loose-leaf varieties, you can start picking individual leaves as soon as they’re large enough to eat. For heading varieties like lettuce, wait until the head is firm.
When harvesting, use clean scissors or pinch off the leaves with your fingers. For many greens, it’s best to harvest in the morning, after the dew has dried but before the heat of the day. This helps prevent moisture from accumulating and reduces the risk of spoilage.
Maximizing Yield with Cut-and-Come-Again
The cut-and-come-again method is a great way to maximize your yield from a single planting. This involves cutting the leaves about an inch above the soil line, allowing the plant to regrow new leaves. This method works well for varieties like lettuce, spinach, and arugula.
- Use sharp scissors to cut the leaves, reducing damage to the plant.
- Leave enough of the stem and leaves intact to allow for regrowth.
- Harvest regularly to encourage the plant to continue producing new leaves.
Storing Freshly Harvested Greens
After harvesting, it’s crucial to store your greens properly to maintain their freshness. First, gently wash the leaves in cold water to remove any dirt. Then, dry them thoroughly using a salad spinner or a clean towel. Store the greens in a sealed container lined with paper towels to absorb excess moisture.
- Keep the container in the refrigerator at a consistent cool temperature.
- Use the greens within a few days for the best flavor and texture.
- Avoid washing the greens before storing, as excess moisture can lead to spoilage.
By following these harvesting and storage tips, you can enjoy a continuous supply of fresh, delicious greens for your healthy salads and other dishes.
Seasonal Considerations for Growing Greens
Understanding the seasonal nuances is crucial for growing organic lettuce and garden-fresh greens. Different seasons bring varying temperatures, daylight hours, and weather conditions that can significantly impact the growth and health of your salad greens.

Planting in Spring vs. Fall
Both spring and fall are excellent seasons for growing salad greens, but they offer different advantages. In the spring, the cooler temperatures and increased moisture provide ideal conditions for many varieties of lettuce and other greens. In contrast, fall planting allows for a second harvest before the onset of winter, and the cooler temperatures can enhance the flavor of some greens.
- Spring planting: Ideal for varieties like spinach and lettuce that thrive in cooler temperatures.
- Fall planting: Offers a second harvest and can improve the flavor of certain greens.
Adapting to Local Climate Conditions
Your local climate plays a significant role in determining the best time to plant salad greens. In regions with mild winters, you may be able to grow greens year-round, while areas with harsh winters may require you to focus on spring and fall planting. Understanding your local climate conditions is key to successful salad green cultivation.
- Check the average frost dates for your area to plan planting.
- Choose varieties that are resistant to common local pests and diseases.
Using Season Extenders for Year-Round Growth
For those looking to grow garden-fresh greens beyond the traditional growing seasons, season extenders can be a valuable tool. Techniques such as using cold frames, hoop houses, or indoor growing spaces can protect your greens from harsh weather and extend the growing season.
- Cold frames: Simple structures that trap heat and protect plants from frost.
- Hoop houses: Larger, tunnel-shaped structures that can cover multiple beds.
- Indoor growing: Allows for complete control over the growing environment.
Creative Salad Recipes Featuring Your Greens
Transforming your harvest into tasty green salad options is simpler than you think. With a variety of mixed greens at your disposal, you can create salads that are not only delicious but also visually appealing.
Simple Salad Combinations
Starting with the basics, a simple mixed greens salad can be made by combining your freshly harvested greens with some cherry tomatoes, cucumber slices, and a light vinaigrette. You can also add some crumbled feta cheese or nuts for extra flavor and crunch.
- Classic Lettuce and Tomato Salad
- Spinach Salad with Strawberries and Feta
- Kale and Avocado Salad with Lemon Dressing
Advanced Recipes for Unique Flavors
For those looking to experiment, consider making a Watermelon and Arugula Salad with a balsamic glaze or a Kale Caesar Salad with homemade croutons. These recipes not only taste great but also add a gourmet touch to your meals.
- Prepare your mixed greens by washing and drying them.
- Add your choice of toppings, such as grilled chicken, nuts, or dried fruits.
- Drizzle with your favorite dressing and serve.
Incorporating Greens into Other Dishes
Greens aren’t just for salads; they can be incorporated into a variety of dishes. Add spinach to your smoothies, use kale in soups, or sauté mixed greens with garlic as a side dish. The versatility of homegrown greens makes them a valuable addition to any meal.
By experimenting with different recipes and incorporating your homegrown greens into various dishes, you’ll not only enjoy a healthier diet but also make the most of your patio garden’s bounty.
Troubleshooting Common Growing Issues
Growing fresh greens can be a rewarding experience, but it’s not without its challenges. As you cultivate your Salad Greens, you may encounter issues that can impact their health and productivity. Being able to identify and address these problems is crucial for a successful harvest.
Common Problems and Solutions
Some common issues with Salad Greens include pests, diseases, and nutrient deficiencies. Inspect your plants regularly to catch any problems early. For example, yellowing leaves can indicate overwatering or nutrient deficiencies, while holes in leaves may suggest pest activity.
Adjusting Care for Better Results
Adjusting your care routine based on your plants’ responses is key to overcoming growing issues. If you notice your Salad Greens are not thriving, consider factors like soil quality, sunlight exposure, and watering practices. Making adjustments as needed can help you achieve a healthier crop.
Resources for Continued Support
For ongoing gardening support, consider consulting online gardening forums, local nurseries, or extension services. These resources can provide valuable advice and guidance to help you continue growing fresh greens successfully.
Leave a Reply